So, who has bought all their Christmas presents? Not me obviously as I am always a last minute kinda gal, but I’m sure all my sensible followers have bought at least some, if not all, of their Christmas gifts. I do love a nicely wrapped present and think it really adds to the whole gift giving experience so always try and make my presents look nice.
I was actually taught to gift wrap at Harrods when I was a junior window dresser so know a few tricks too to make them stand out from the crowd. I’ve created 10 looks to make your wrapping look amazing this year…plus none of it requires much outlay and much of it you probably already have. Oh yes, we are going to be eco-friendly too and do a bit of recycling! Lets get inspired…
Idea 1:Use fresh foliage –
Theres always so much stuff to use for free – you just have to look for it. Head to your local park for Holly, Ivy, Fir and berries. You’ll only need a few small bits, which you can leave in a small amount of water or damp oasis and then add them a few days before you gift your presents so they don’t dry out.

 Pillow pack / Wilkinsons
Idea 2: Get personal with personalised paper* –
For paper that really grabs peoples attention why not create something truly unique? Pretty Gifted is a fantastic online seller of personalised gift wrap – you pick your paper colour, your print foil, your font and your message and they do the rest. For £7.95 you get a large sheet of fantastic quality wrap, a gift tag and a metallic pen. I went for a little message to my boyfriend to wrap one of his presents in – ‘gifts are nice, but our love is everything!’ Lets get this whole season of buying stuff in proportion, eh?!?


 Gift wrap sheet, tag & metallic pen / Pretty Gifted*
Curling ribbon / The Works
Wooden decoration / Demelza Hospice shop
Idea 3: Map it out –
Know a person who loves to travel? Maps are something of a blast from the past these days but whenever I see old ones I want to make use of them. Dig out your old ones from the back of the cupboard or source vintage maps from charity shops and second hand stores and you will have some ready-made and totally personal, wrap. Just add ribbon…


 Vintage maps / various charity shops
Ribbon / Tiger Stores
Idea 4: Make part of the present the wrapping –
Giving a gift of a scarf or similar? Why not use it as the gift wrap? Theres nothing like getting two presents for the price of one! If you can’t use the gift itself you could use a beautiful off-cut of fabric – just wrap it around the gift, add a satin ribbon to fasten, and you are done!

 Vintage scarf / my own
Satin ribbon / John Lewis
Gift tag / Clintons
Idea 5: When theres not much time but you still want to be individual –
We’ve all seen all the gift boxes you can get in the card shops – they are easy to use, but usually not that exciting. However, life gets busy so for a short cut use pre-made gift boxes, but do it your way. Change the ribbon and the tags and add some personal touches such a giant bows and christmas decorations – now your box is totally unique.


 Gift boxes / The Works (striped), Card Factory (glitter), Sainsburys (gift card)
Curling ribbon / The Works
Tree decoration / Demelza Hospice shop
Idea 6: Christmas decorations –
This time of year its easy to find a different decoration to suit every type of person, so why not add it your parcel as a personalised gift tag? The person can keep it afterwards and add it to their tree as a keepsake. For a special gift, look for collectable decorations and for a more budget friendly version check out the supermarkets, Wilkinsons or charity shops – many charity shops have ranges of new decorations for sale and you can help a worthy cause at the same time.


 25th Dec wrapping paper / Clintons
Wood & raffia decoration / Demelza Hospice shops
Set of 3 porcelain decorations / Georg Jenson at John Lewis
Ribbon / Tiger Stores
Idea 7: Recycle that newspaper –
Boring old newspaper can look amazing as a present wrapping. Use an unfamiliar paper such as one from a foreign country or as I have here, the Financial Times. Look out for vintage newspapers and comics – for a really individual touch you could use one from the year that person was born.

 Financial Times / selected newsagents
Ribbon / The Works
Idea 8: Doilies –
Paper doilies have gone out of fashion in recent years but they are easy to track down in the party and disposable plates section of many stores. They make a fabulous addition to gift wrap particularly with a simple paper underneath. Want a truly unique gift wrap? Then this look is for you.


Brown paper / Poundland
Decorative string / The Works
Paper Doilies / Tesco
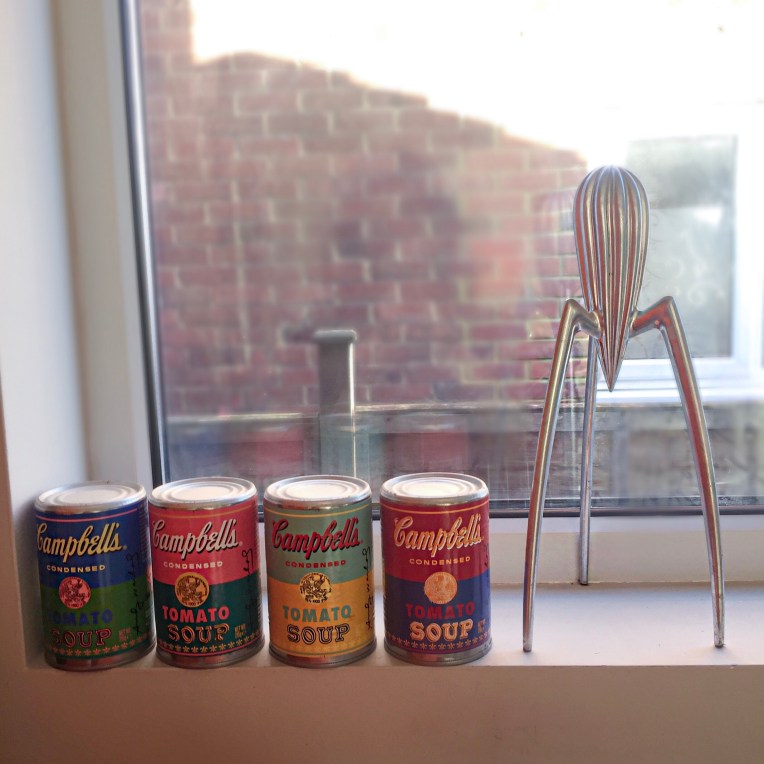
Idea 9: Tins –
Tins, both vintage and Christmas themed are really a gift in themselves for wrapping smaller presents. Look out for unusual ones throughout the year and then add your smaller gifts into them. Finally just add a bow and boom – done!

 Tins / charity shops, Poundland, Ikea
Ribbon / Tiger Stores, M&S
Idea 10: Tinsel is not just for the tree –
For a fun look tinsel can work perfectly as an alternative to ribbon. Look for rolls of mini tinsel which is usually used as a garland or for smaller trees and wrap it around your wrapped gifts. Cut smaller sections and tie together to make a starburst bow and your gift will look amazing!

 Mini tinsel garland / John Lewis
Gift tag / John Lewis
Wrapping paper / Poundland
And finally, some tips to make your wrapping look great. Remember with gift wrapping, the basics matter –
- Measure out how much paper to cut by rolling out your wrapping paper and then placing the item (ideally a box) in the centre of the paper, upside down, so the seams of the paper will end up on the bottom of the package. Bring the paper up one side and over the top of the box, all the way to the opposite edge estimating how much additional paper you’ll need to cover the side of the box that’s not yet covered and then cut the paper.
- Bring one side of the paper up the side and halfway across the top, affixing it to the box with a piece of tape.
- Before bringing the second side of paper up and over the first, create a clean seam by folding over the last half-inch or so of the paper, using your fingers to create a tight crease. Now bring this side up so it just overlaps the first one and affix with tape – double-sided tape can be used for an even neater look. Position the fold on an edge for a seamless look, making sure you line up any patterns.
- Fold the paper on each side of the present and starting on one end, fold down the top flap onto the side of the box, creating two little wings at the side. Flatten those in against the box, then fold the remaining triangle of paper up against the box. Fasten it in place with a small piece of tape.
- Add your bows and tags as required. Curl ribbon with the underside of a sharp pair of scissors and cut ribbon ends into forks or angles.
Enjoy getting ready for the holiday season! If you use any of these ideas I would love to see! Tag me on Instagram – @blueskygirlie.
.
*items marked with an asterisk denotes a gifted item but all views stated are my own. For more information please see my disclaimer section.
All photos are my own and cannot be used without permission.


You must be logged in to post a comment.